
Remote, Automatic Watertank Level Monitor (System 2)
Last Update: Oct 28, 2018
Introduction
This is actually an upgrade of a previously existing system.Quick summary: We wanted to monitor how much water was in a water tank. An ultrasound distance sensor mounted in the top of the tank monitors the distance to the top of the water column. The sensor talks serial, so it links to a "base station" that connects it to the web. It's connected to this base station by a differential signal link (derived from RS-485) running over a few hundred feet of CAT5. Originally the base station used a Roving Network RN-171 module to connect to the web. At the time these modules were relatively expensive and awkward to use - I didn't have access to any SDK or development kit and was stuck using it as a standalone module, meaning I had to add another microcontroller to the system to manage the whole thing. In the intervening years, a lot has happened.
The selection of Wifi-capable modules has increased and the prices have dropped considerably. Consider the Raspberry Pi Zero W: about half the price of the RN-171 module, has Wifi, and runs a full featured Linux installation!
I'm not a fan of Broadcom due to their insistence on large purchase orders and NDAs for access to basic documentation, but it's hard to beat a $14 (USD) computer. At that price point it undercuts many common 8-bit microcontroller boards that have a fraction of the functionality. I briefly looked into running a lightweight web server and database directly on the RasPiZ, but unfortunately the usage case precluded that option: multiple clients needed remote access to the data, but the Internet connection available was a typical residential DSL - no static IP address. Simplest solution was to keep using a remotely hosted website. Enter the Espressif Systems ESP8266.
It's hard to understate how much this changed the hobby electronics scene. This part incorporated all the RF hardware (sans antenna) and a microcontroller into a single chip. Modules could be had for $5 USD (or less, if you shopped around and/or bought in bulk). Suddenly every project could have Wifi. It's been several years since this part hit the English-speaking electronics scene and the market has matured somewhat.
Entering into this project I was aware that bare metal/C development for the module was a bit hairy (the ESP8266 sports a proprietary microcontroller), but that custom firmware blobs existed to implement embedded scripting languages (notably MicroPython and NodeMCU).
I've dabbled in Lua before so NodeMCU seemed like the best choice.
The Hardware
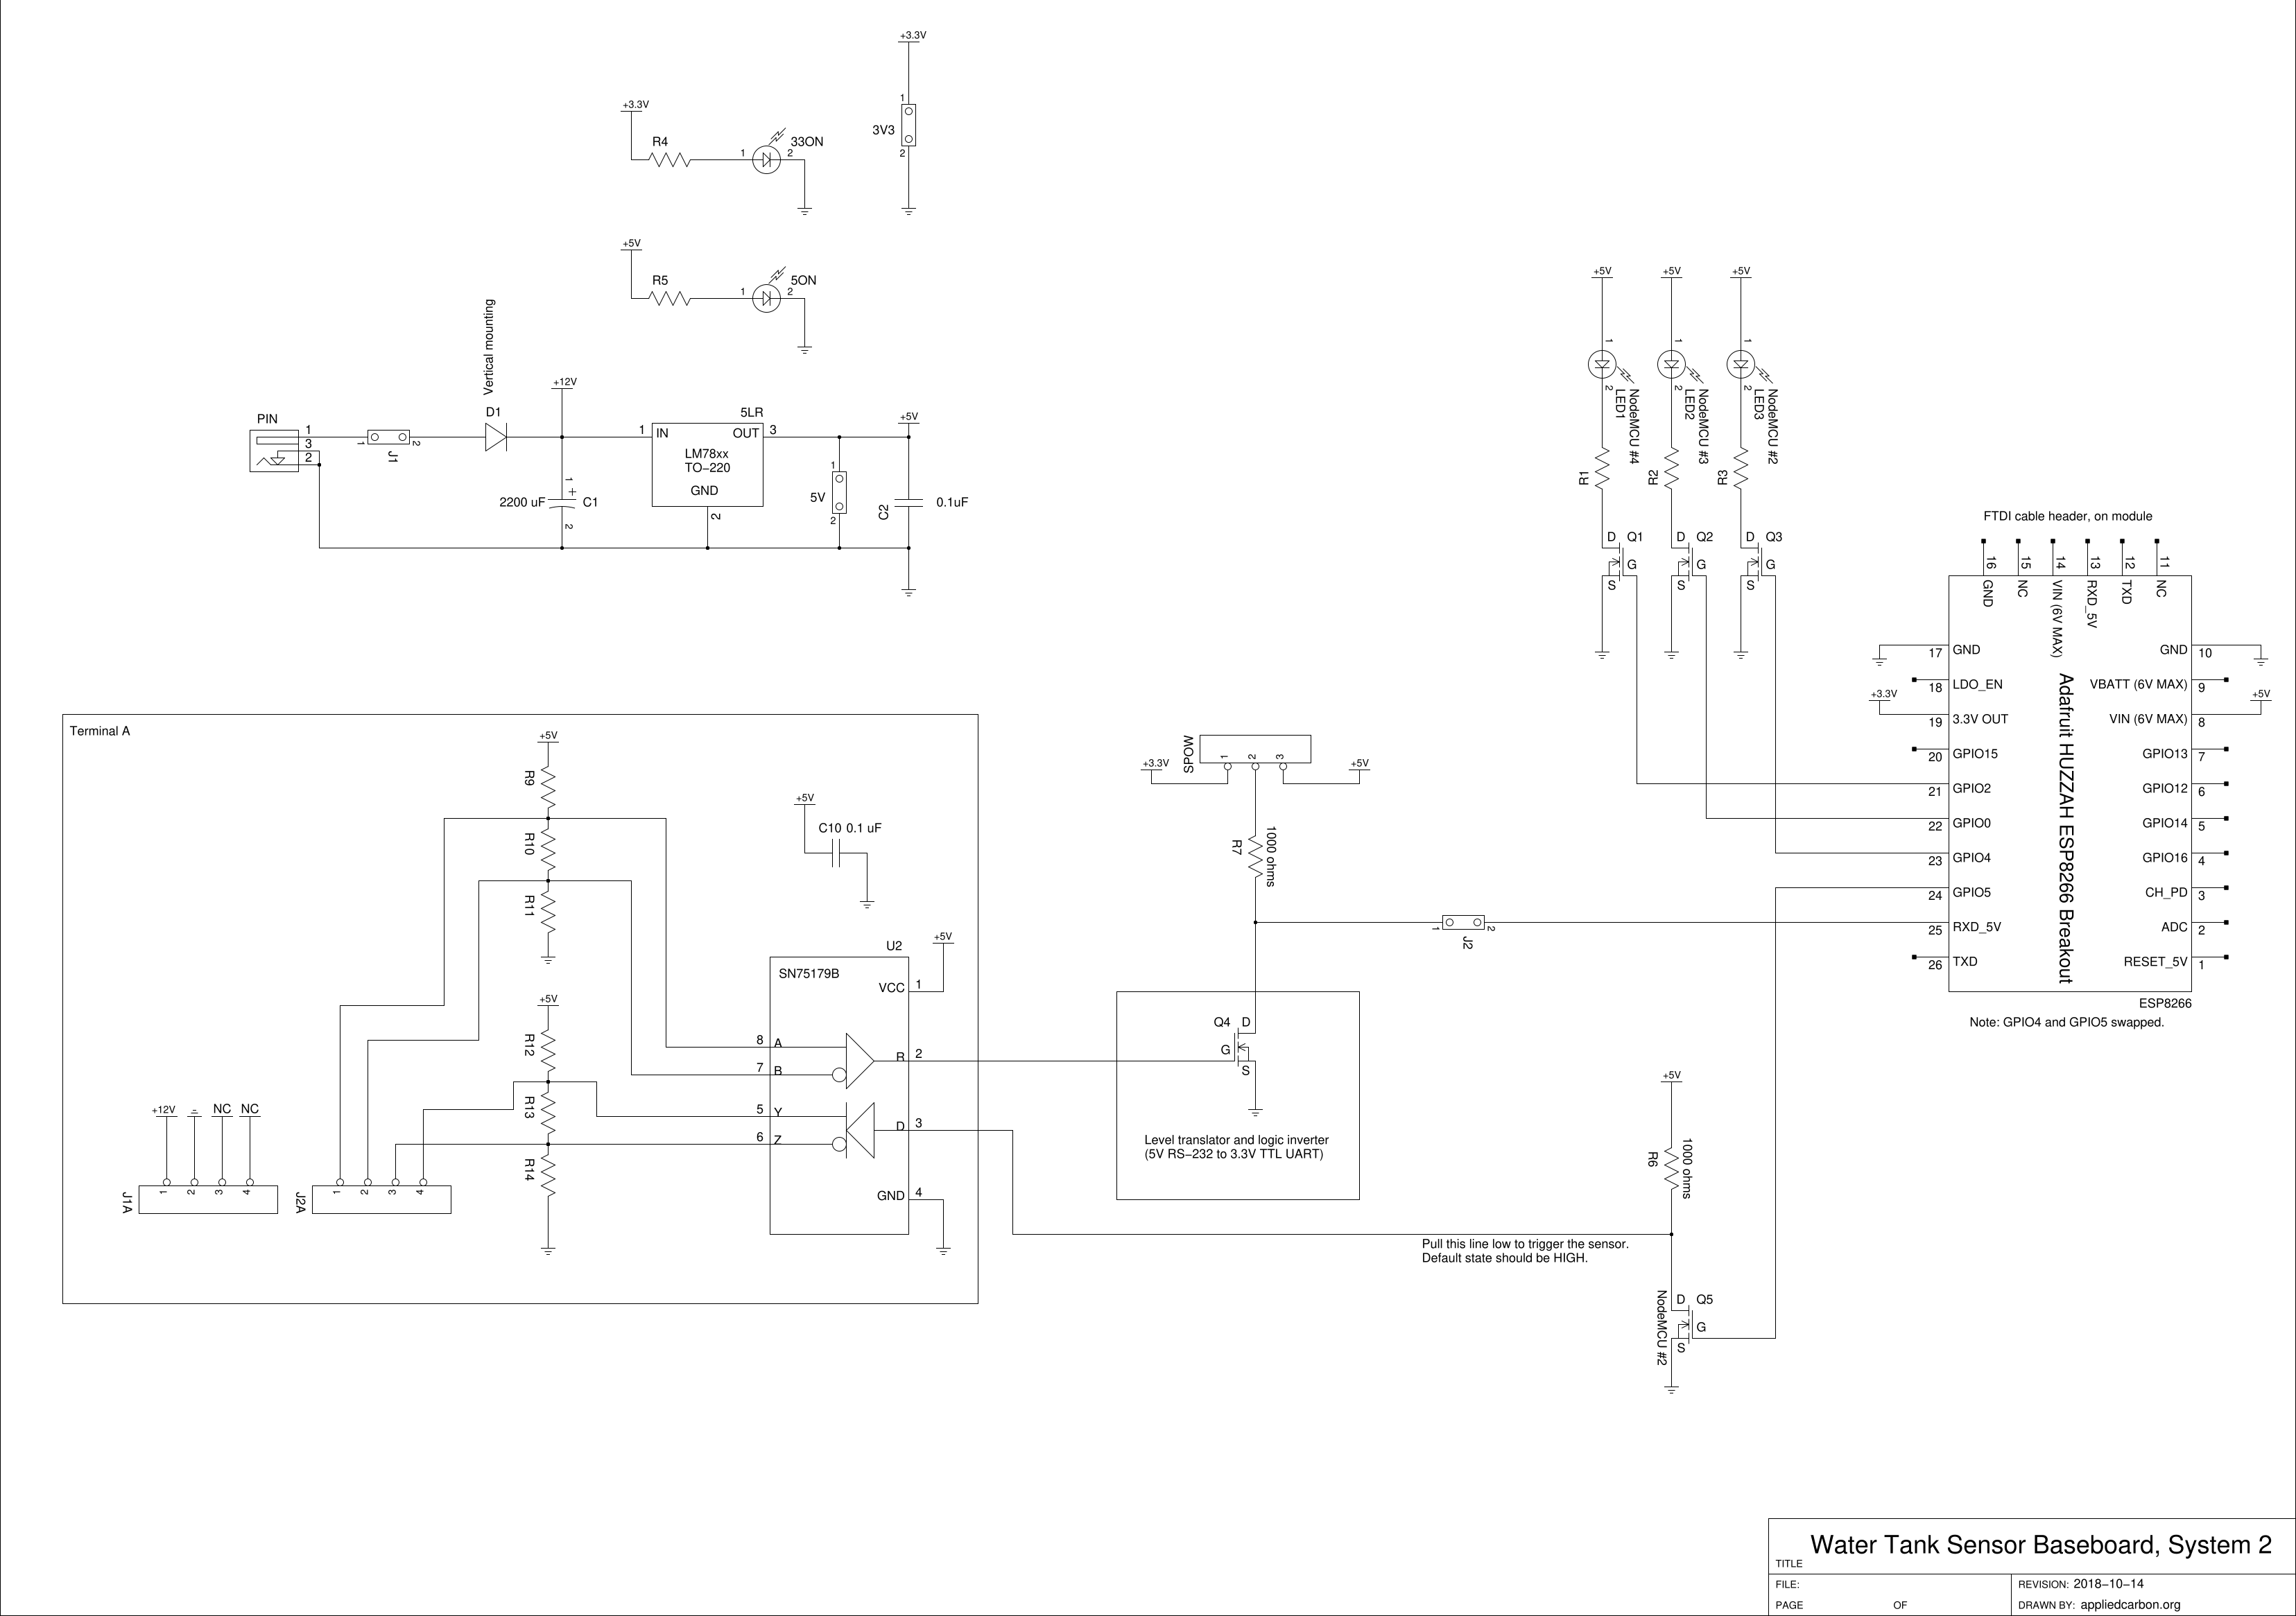
Cheap ESP8266 modules are all over eBay, but I opted for the Adafruit HUZZAH ESP8266 Breakout. Inexpensive, easy to use form factor, and some handy on-board support parts (3.3 volt source, LEDs, reset/GPIO buttons). The module has a serial port (5V tolerant, even) but I still needed to add a differential driver and other support parts. This is what I came up with: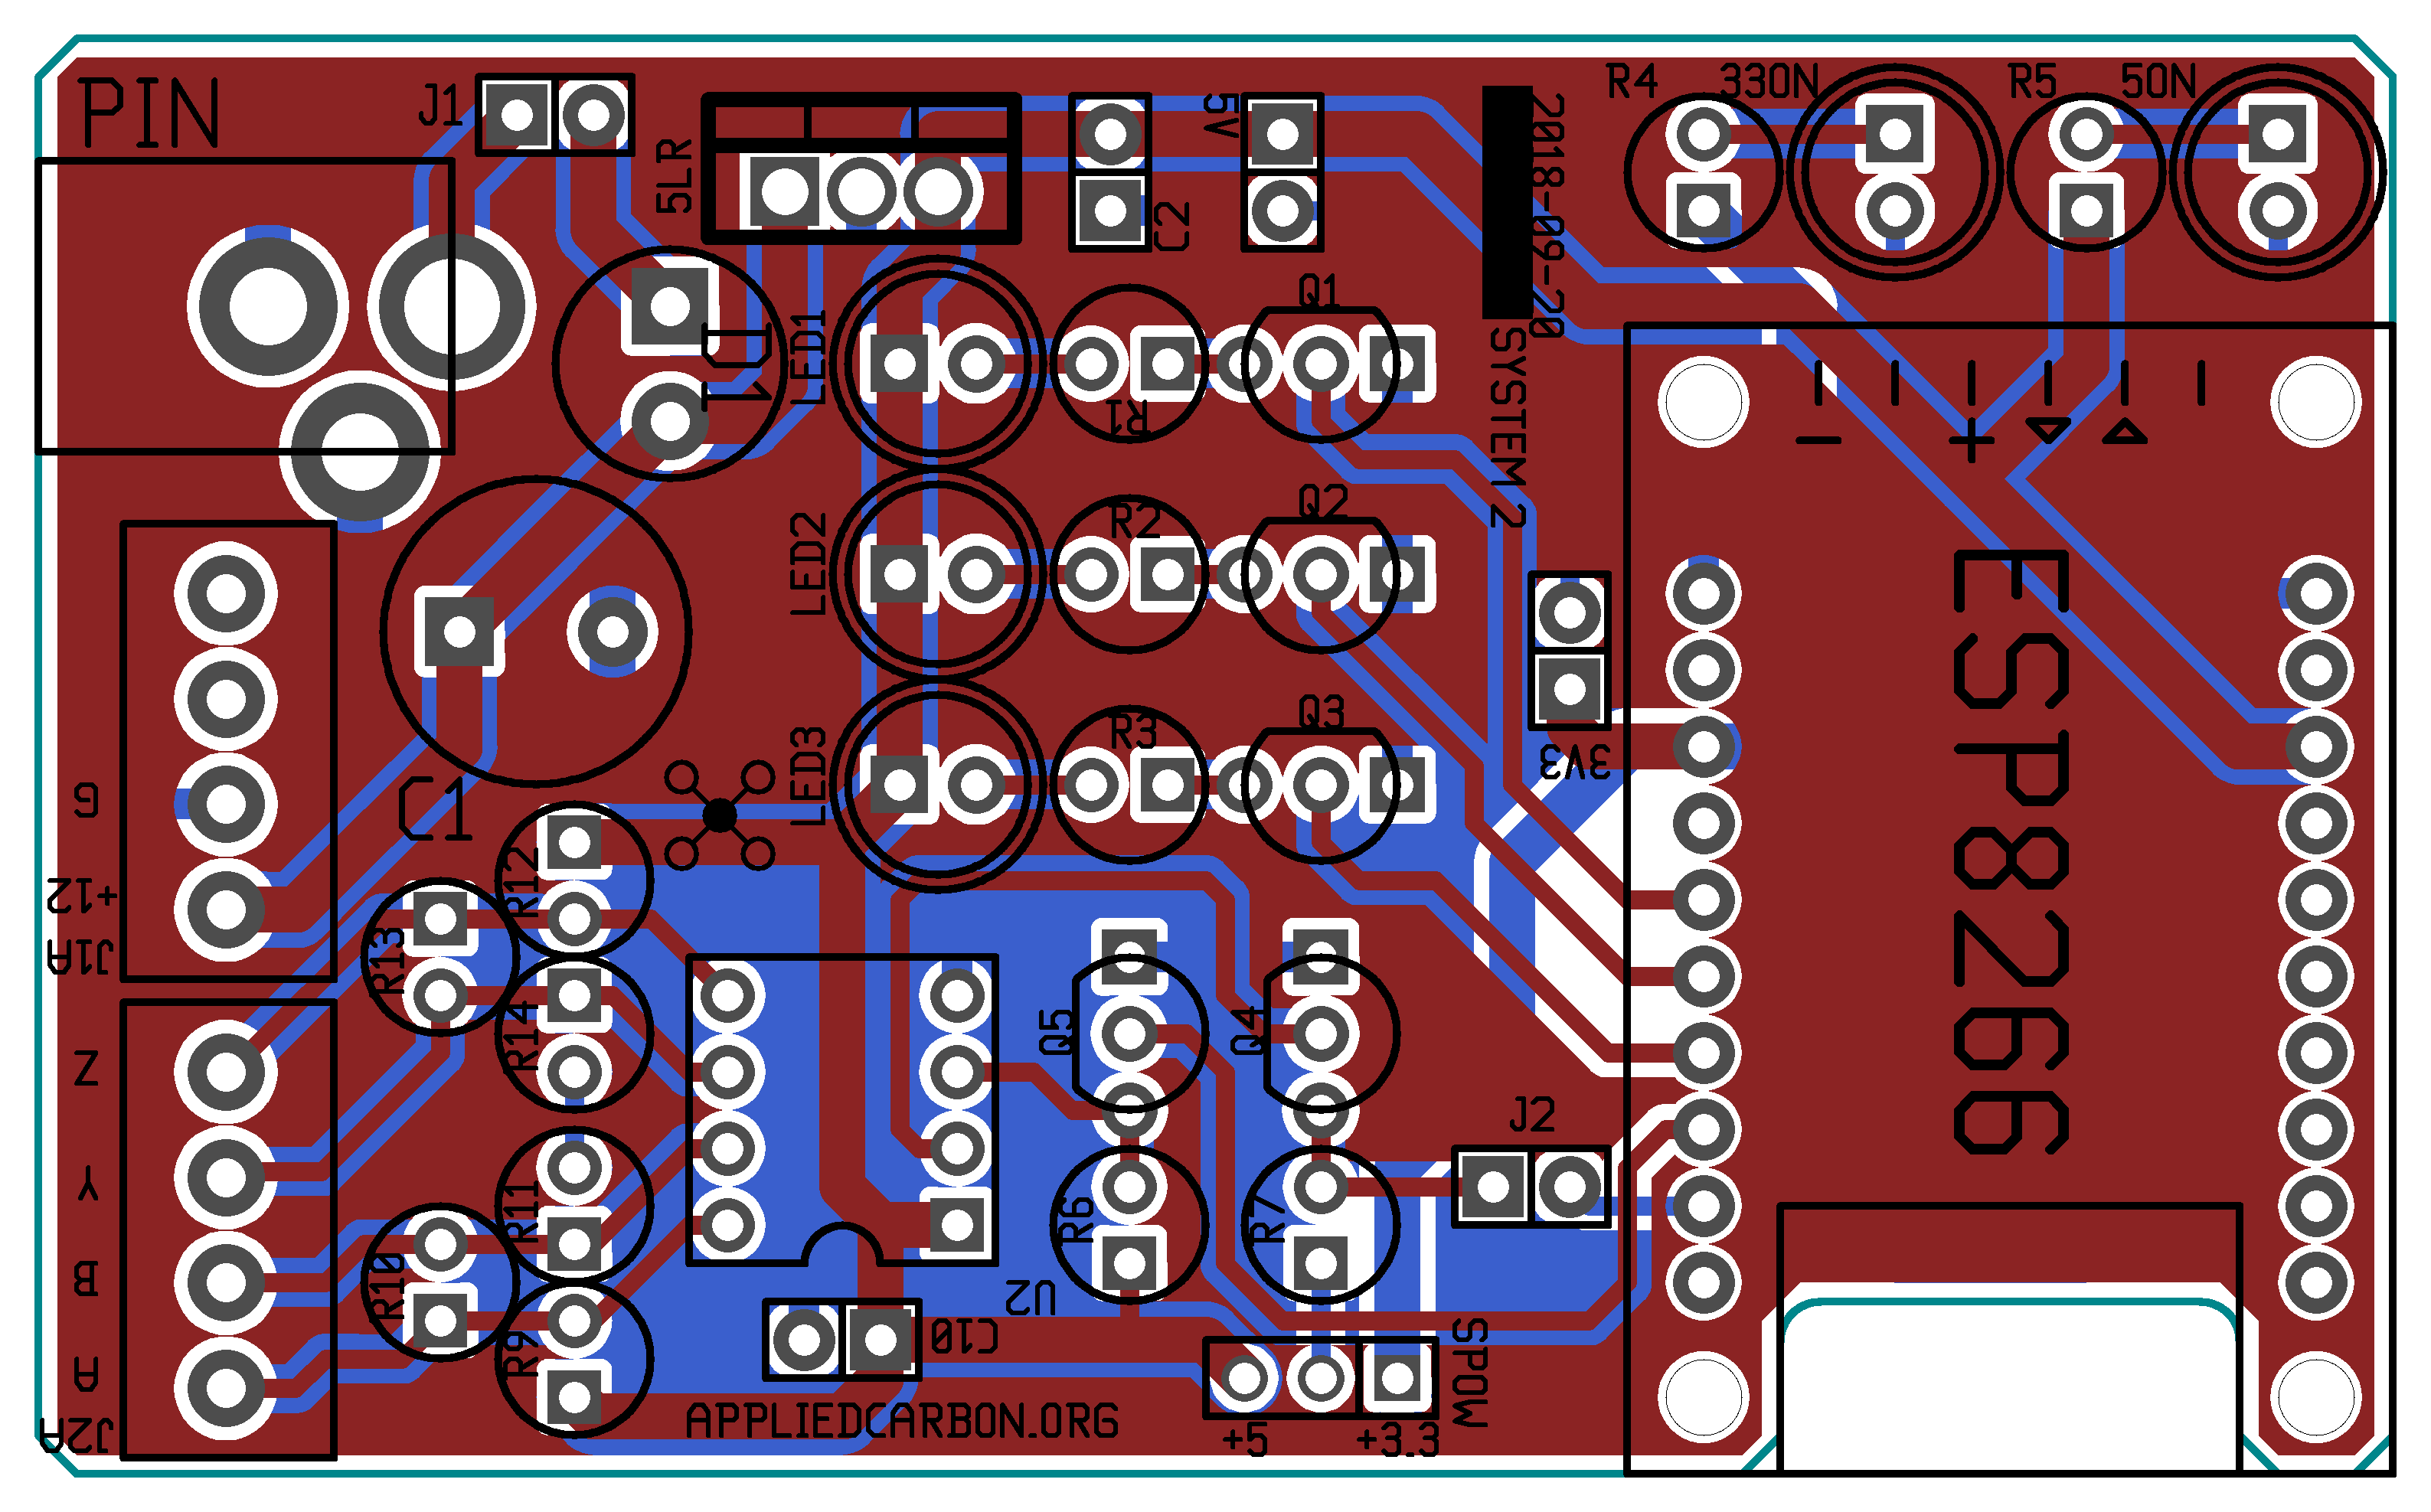
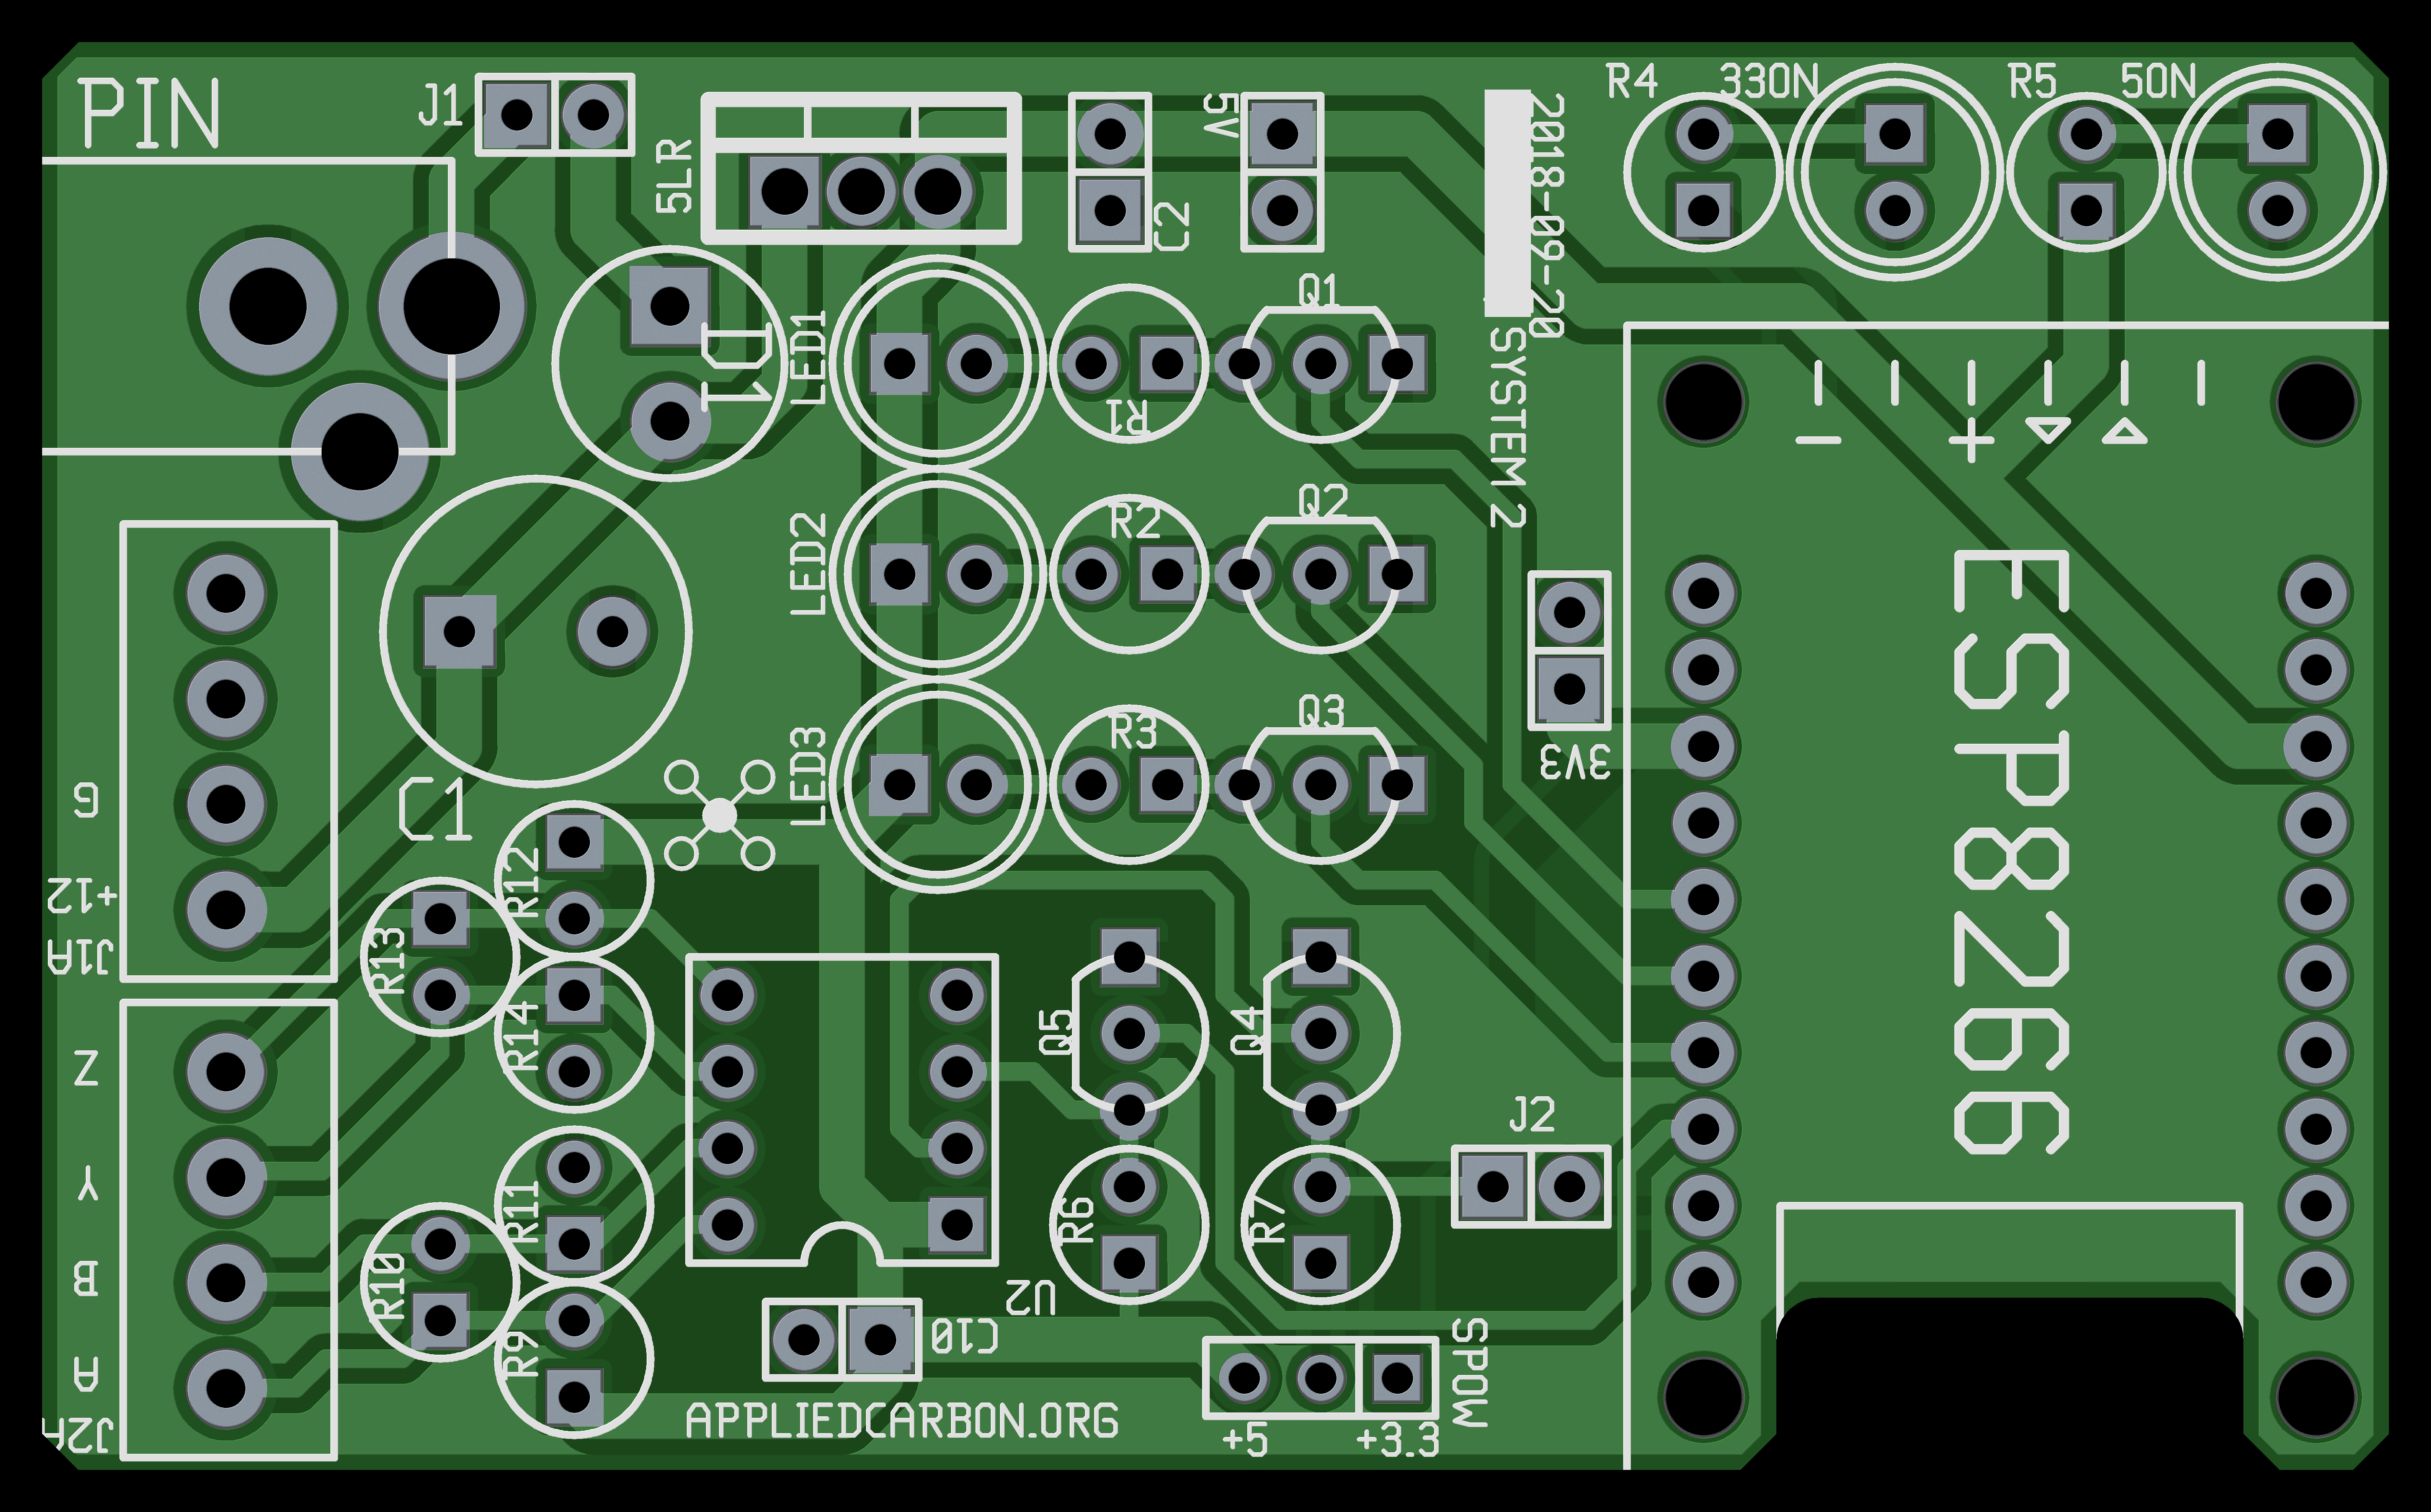
Schematics: PDF / PNG
The transistors are 2N7000 n-FETs in TO-92 packages.
The DIP-8 part is the same Texas Instruments SN75179B Differential Driver and Receiver Pair from the previous revision (if it ain't broke, don't fix it).

Quick tip: use common disposable nail files to take down the sharp snap points on the PCBs. Your fingers will thank you.
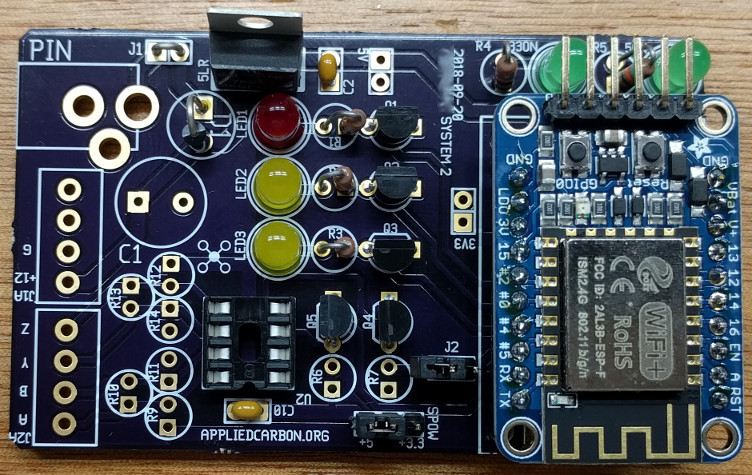

Ready for install. A socketed ESP8266 module was very useful for debugging in the field. No need to unscrew all those terminals.
Note the clipped resistors leads on R1 and R2. The module already had LEDs on those pins. Oops.
The Software
The Adafruit board comes with a version of NodeMCU preinstalled, but I opted to recompile the firmware to make sure it had the optional Lua modules I needed.Thankfully somebody has done the heavy lifting for us: nodemcu-build.com lets one pick the modules they need and the server spits out the compiled firmware a few minutes later. I selected the crypto, file, gpio, http, net, node, tmr, uart, wifi, and tls modules.
You can grab the firmware module here. I used esptool.py to upload firmware, along with a FTDI TTL-232R-3V3 cable.
Hold down the
GPIO0 button, click the Reset button, and then release both. The red status light should come on and stay on, but appear dim.Upload your firmware at that point, like so:
esptool.py --port /dev/ttyUSB0 write_flash -flash_mode dout 0x00000 nodemcu-master-10-modules-2018-10-08-19-08-32-integer.bin
If you end up with a module showing anomalous behavior, you may need to wipe the flash chip and try again:esptool.py --port /dev/ttyUSB0 erase_flash
Use your serial console of choice to connect to the module. Default baud rate is 115200, eight bits, no parity bit, one stop bit (8N1).If everything went well, pressing the reset button should send a bunch of start up info to your console before dropping you into the Lua interpreter prompt.